
Upon receiving your Dito Sim card, the activation process is crucial to ensure seamless connectivity and utilization of services. From inserting the SIM card to selecting a data plan, each step plays a vital role in activating your Dito Sim. However, the intricacies of online activation versus SMS activation and troubleshooting potential issues may pose challenges for some users. Understanding these steps and effectively navigating through them can lead to a successful activation experience.
Checking Dito Sim Eligibility
Before activating a Dito Sim, it is essential to check the eligibility requirements by verifying qualifications and eligibility criteria.
This checking process ensures compatibility with the intended device and network specifications.
Purchasing a Dito Sim Card
To begin the process of activating a Dito Sim, the first step is purchasing the SIM card. This involves selecting a Dito Sim card from an authorized retailer or online platform.
Once the SIM card is acquired, the activation process can be initiated following the specific instructions provided by Dito.
Buying the SIM
Purchasing a Dito SIM card is the initial step towards activating your Dito service and accessing its mobile network capabilities.
Dito offers various SIM card types, including regular and micro-SIMs, which can be purchased from authorized Dito retailers, convenience stores, or online.
Activation fees may apply, and payment options typically include cash, credit/debit cards, or mobile payment platforms for a seamless purchasing experience.
Read more : Here Is the Translation: “Here Yes
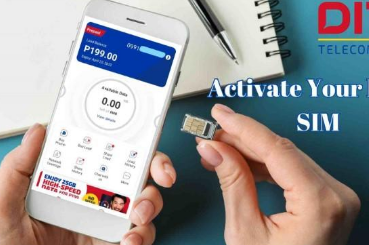
Activation Process
After acquiring a Dito SIM card, the next step involves initiating the activation process to enable the utilization of Dito’s mobile network services.
The Dito sim activation steps include inserting the SIM card into your device, dialing the activation number provided, and following the prompts.
Additionally, ensure you have met the Dito sim activation requirements, which may include presenting a valid ID and providing necessary personal information for registration purposes.
Preparing Your Dito Sim
How can you ensure that your Dito SIM is properly prepared for activation?
Start by inserting the SIM card into your device and ensuring network coverage is available.
Next, select a suitable data plan based on your needs.
Check the signal strength in your area to guarantee a smooth activation process.
Properly preparing your Dito SIM will help you seamlessly transition into the activation phase.
Activating Dito Sim Online
To activate your Dito Sim online, you will be guided through a step-by-step process on the official Dito website or mobile app.
This method allows for a convenient and efficient activation experience.
Additionally, troubleshooting common activation issues will be discussed to ensure a smooth activation process.
Online Activation Process
The online activation process for activating a Dito Sim can be conveniently completed through the official Dito website.
To begin, users need to perform online registration by providing necessary details.
Ensure that the Sim card being activated is compatible with the Dito network to avoid any issues during the activation process.
Troubleshooting Common Issues
Common challenges encountered during the online activation process of a Dito Sim can be effectively addressed through systematic troubleshooting methods.
Ensure optimal signal strength by placing the SIM card in an area with good reception.
Verify network coverage in your location to prevent activation delays.
If issues persist, restarting the device or contacting Dito’s customer support for further assistance may resolve any activation hurdles.
Activating Dito Sim via SMS
By sending a specific code through SMS, customers can activate their Dito Sim card efficiently. Ensure SIM card compatibility before proceeding.
The activation process is straightforward; simply insert the Dito Sim card into your device and send the activation code via SMS. Once done, wait for confirmation of successful activation.
Verify network coverage in your area to ensure seamless connectivity after activation.
Setting Up Dito Internet Settings
To ensure a seamless browsing experience after activating your Dito Sim card, configuring the Dito internet settings on your device is imperative. Adjusting the internet settings correctly will optimize network coverage and ensure smooth connectivity.
Make sure to input the appropriate APN settings provided by Dito to access their high-speed data plans efficiently. Proper setup guarantees a hassle-free online experience tailored to your data needs.
Testing Dito Sim Connection
Upon activating your Dito Sim card and configuring the internet settings, the next step involves testing the connection to ensure seamless network functionality.
Check the signal strength indicator on your device to ensure a strong connection. Additionally, perform a speed test to assess the network speed.
Confirm that you are receiving the expected signal strength and network speed for optimal performance and a satisfying user experience.
Troubleshooting Dito Activation Issues
Identifying and addressing common activation issues encountered with Dito Sim cards is essential to ensure a smooth and successful activation process.
Troubleshooting network issues and ensuring proper signal reception are key steps in resolving activation problems.
If activation fails, check for network connectivity, insert the SIM correctly, and ensure the device supports Dito’s network bands.
Contact Dito’s customer support for further assistance if issues persist.
Conclusion
In conclusion, activating your Dito Sim card requires following a few simple steps to ensure a seamless process. By checking eligibility, purchasing and preparing the sim card, and activating it either online or via SMS, you can enjoy the benefits of Dito’s network.
Remember to set up your internet settings and test the connection for a smooth experience. Are you ready to experience fast and reliable connectivity with Dito?